Silver Heartbeats: Everyone Should Archive Family Photographs

We live in a digital age. We can take photos so easily and quickly, and have results almost instantaneously. With this technology at our fingertips, it’s hard to remember that there was a time that photography was not as accessible. During my childhood, disposable cameras were the coolest. It was even cooler that you could take your film to Walgreens and have your film back in an hour. The further you go back in time, the less convenient photography was. Being limited during those times resulted in fewer records of preserved history. As time goes on, these precious memories can become lost. Luckily, my Grandmother is a fastidious record keeper, and definitely had many photographs and other memories of hers kept over the years. I was fortunate enough to be able to scan, archive, preserve, and restore these precious memories; preserving them for my entire family.
I started archiving and restoring old family photographs because I’m a huge nerd, and I knew my education and skills meant I could do it in a way that would keep these memories alive. Everyone deserves and is entitled to their own family history and memories. Also, because I am a huge nerd, I had to give this personal project of mine a name: Silver Heartbeats. Silver, because it is an important ingredient in photographic film chemistry, and heartbeats, because these images keep the subjects alive.

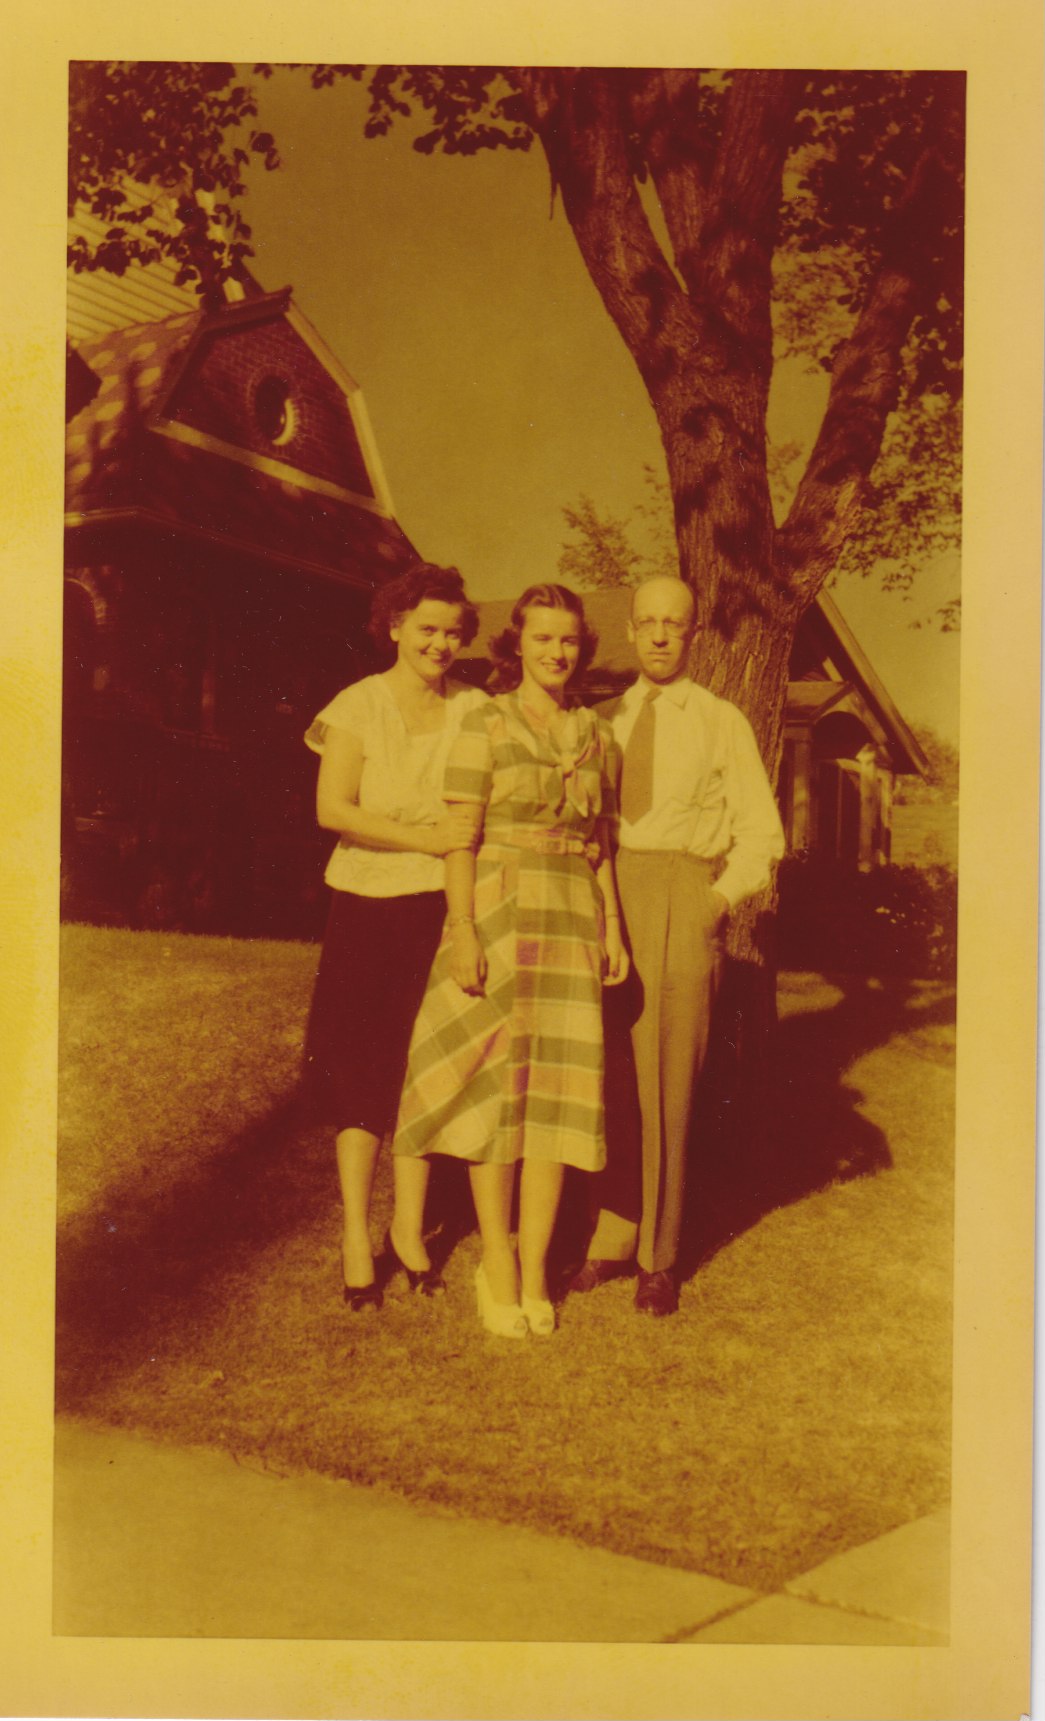
My grandma, age 21
I started by scanning and archiving photos that were older and needed restoration. I figured I could then take them to my Grandmother and have her identify people who I didn’t recognize in the photos, and also share the before and afters on social media for fun. As a result, family members of hers have chimed in with memories giving context to photographs I knew nothing about. They enjoy reminiscing and seeing how photographs are brought to a place as close to what real life could have looked like for the technology at the time.
Every family in the world has history, and many of them have photographs, but probably don’t realize their importance and how to keep them safe against the wear and tear of time.
It’s easy to think that you can take that old cardboard box waiting to be recycled and see it as a storage vessel. Well, for family photographs this isn’t the best idea--especially older ones that were printed from film. Film is processed with a variety of chemicals, and most commercially printed cardboard boxes, folders, and plastics contain chemicals such as PVC and different acids. If you’ve seen old newspapers yellow with age, this is a result of that. These chemicals can affect digital prints as well, but especially prints processed from film. Various glues, tapes, and other adhesives can hurt the emulsions of images as well.

Photograph with damage from scotch tape.
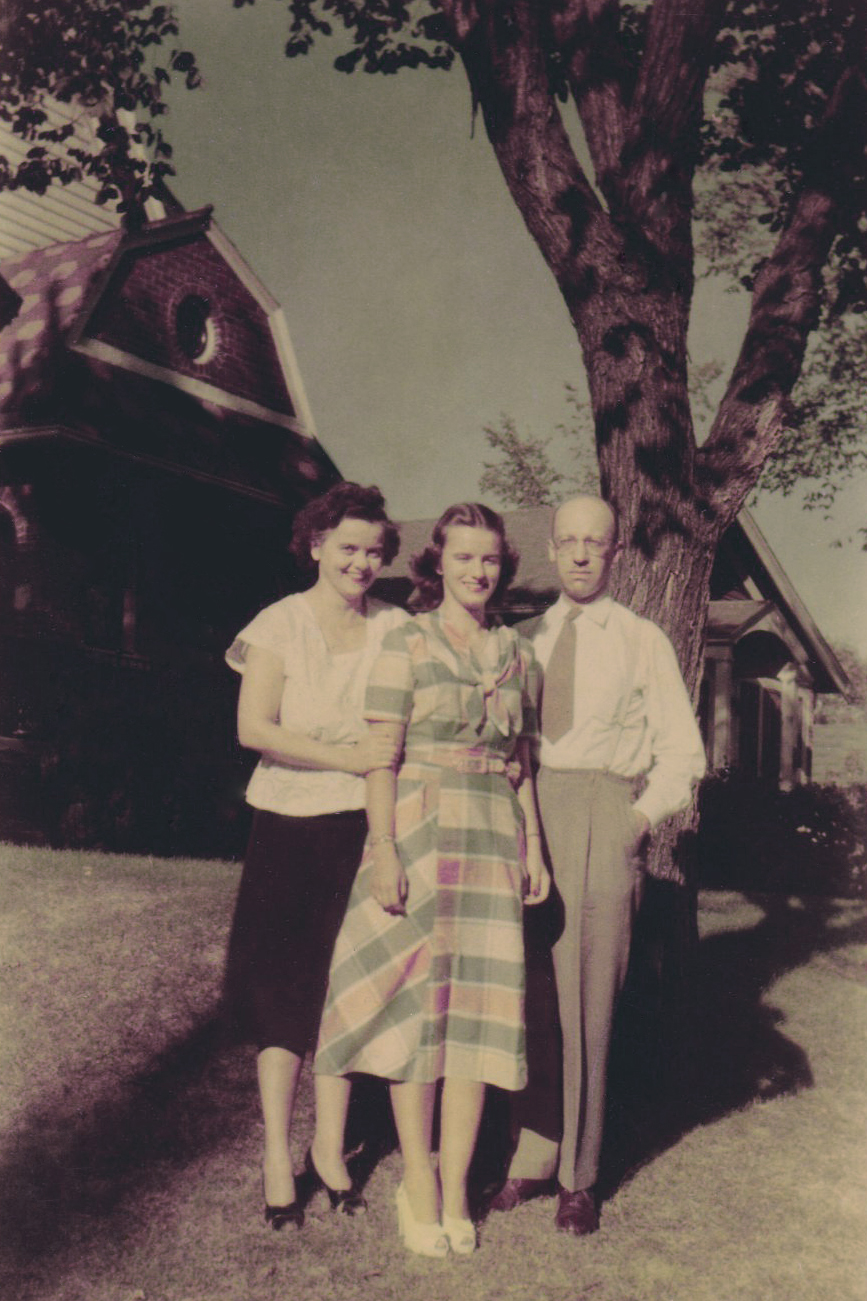
A yellowed image followed by the restored, color corrected version
I learned these methods during photography classes in undergrad, and my own personal research. I am not a trained archivist for a museum or historical society, but anyone can archive their own family collection. The National Archives website offers great information about how to archive, handle, and restore old family images and offer more information about it than what you see here. It’s a very easy process as long as you stay organized and remember that it can be a pretty tedious process depending on the size of your collection. Since I started work on this project, I’ve had several individuals ask about how I am going about archiving and preserving this collection.
There are many different ways to do this kind of project and many different tools you can use. I’m just about a month into the project and I’ve been keeping things pretty simple and basic.
As I got started in the process, I purchased plastic sleeves, cotton gloves, labels, and an archival paper box. There are many ways you can do this, but just make sure the packaging says that the materials are “Archival, PVC free, and acid free.” There are many different boxes, plastic sleeves, albums, and materials with this option. I write an identifying number on the label and stick it to the outside of the plastic sleeve. This number corresponds with a categorized spreadsheet into which they are recorded according to the information known about them.


The information that I record into the spreadsheet is who is the subject in the photograph, year it is from and any further context, date archived, if it needs retouching and if I have what date that occurred, and where the print physically lives. Since the process is tedious, lengthy, and slow-going, this record helps me keep track of all the photographs. If the physical collection were to ever be split up or relocated in any way, this spreadsheet helps keep track of this as well.
I handle the images with cotton gloves to keep any dirt or oils from my skin off the images. Many that I were working with had already seen this kind of damage, especially older ones, and I found that they were dirty and leaving residue as it is. While it is definitely best practice to use cotton gloves when handling old photographs, it isn’t necessary. Just make sure your hands are clean and dry without any product such as lotion on them and try to handle the images by the edges. The older a print is, the more care it should receive.

The faded edges of this image are from finger print damage over the years.
For pieces larger than 8.5x11” I purchased these larger sleeves. You can oftentimes find these housing old magazines for sale at antique malls. For smaller prints you can find plastic sleeves with partitions that can hold multiple images per sheet. If you’ve ever collected baseball cards and kept them in sleeves within binders, this is pretty much the same thing.

I much prefer sleeves to sheets with adhesive backing like you can find in traditional photo albums as this could harm the prints regardless, even if the adhesive is acid free. They could tear if ever removed, or the adhesive can lose its stick.
Once images are archived, it is best to keep them in as much of a cool, dry place as possible as heat and humidity can cause damage.
The above process best applies to loose prints, snapshots, cabinet cards, and folios. Any item with physical damage requires extra care, tools, and methods for archiving and preservation (this will likely be a different blog post).
Once archived and scanned--the digital images can be used for a variety of projects! You can upload them to social media, restore them, make photo books, or print for gifts just to name a few options. I have a few ideas for how I could work with this collection, but for now I have to at least get 90% done with this process first.
If you have any questions about archiving and restoring photographs or if you have an idea to share from your own process, do not hesitate to email me at emilywayland13@gmail.com. You can see before & afters on my Instagram feed, and behind the scenes of my process can be seen within my Instagram Stories. Be sure to follow the hashtag #silverheartbeats to follow along with this project and any updates.
Sincerely,
The Girl in the Unicorn Pajamas